You lie in bed, the newborn at your breast, and you hear from the kitchen: "Maaama, I want something to eat!" Your heart skips a beat – getting up isn't an option right now, and at the same time, you don't want to keep your firstborn waiting. This is where a well-thought-out postpartum emergency plan comes in: With the right snacks, placed within reach and some even prepared by your older child, this challenge becomes an opportunity for everyone. You remain relaxed, your elder feels independent – and everyone stays satisfied and happy.

Why a Snack Emergency Plan is Worth Its Weight in Gold in the Postpartum Period
The postpartum period is a time for regeneration – for you and for the entire family. While you care for your newborn, your firstborn still needs attention, structure, and of course, regular meals. A well-thought-out snack plan relieves you of the pressure to constantly go to the kitchen and gives your older child the feeling of "I can do this myself!"
Studies show that children who are involved in everyday routines develop confidence more quickly. That's exactly what you can leverage: By preparing healthy snacks and involving your child in the preparation, you not only promote their independence but also relieve yourself significantly.
The Three Pillars of Your Postpartum Snack Plan
- Preparation: Snacks that you prepare before the birth or in quiet moments
- Accessibility: Place everything at child height and ready to grab
- Independence: Simple recipes that your child can make alone or with minimal help
The Nursing Basket: Your Secret Helper for Relaxed Nursing Moments
Imagine: You're sitting or lying comfortably, the baby is breastfeeding peacefully – and your elder can help themselves without you having to get up. The nursing basket makes this possible. It is a small basket or bowl filled with healthy, portioned snacks that your older child can reach at any time.

What's in the Nursing Basket?
- Dried Fruits: Apple rings, apricots, mango – sweet, healthy, long-lasting
- Nuts and Seeds: Almonds, cashews, pumpkin seeds (from 4 years old due to choking hazard)
- Energy Balls / Nursing Balls: Homemade from dates, oats, nuts – keep for several days in the fridge
- Granola Bars: Best homemade, without added sugar
- Vegetable Sticks: Carrots, cucumbers, bell peppers – pre-cut in a box
- Rice Cakes or Corn Cakes: Light, crispy, popular with children
- Cheese Cubes: High in protein and filling
Place the basket on a low shelf, side table, or even right next to your nursing spot. This way your child can access it independently while you focus on the baby.
Healthy Snacks You Can Prepare in Advance
Preparation is everything – especially in the postpartum period. You can prepare these snacks in the last weeks of pregnancy or on a quiet afternoon and freeze or store them in portions.
Energy Balls (Nursing Balls)
Ingredients: 200 g dates (pitted), 100 g oats, 50 g ground almonds, 2 tbsp cocoa, 1 tbsp honey or maple syrup, a bit of water
Preparation: Blend all ingredients in a mixer, form into small balls, store in the fridge. Shelf life: approx. 5-7 days.
Homemade Granola Bars
Ingredients: 200 g oats, 100 g nuts (chopped), 50 g raisins, 3 tbsp honey, 2 tbsp coconut oil, 1 banana (mashed)
Preparation: Mix everything, spread on a baking sheet, bake at 180°C for about 20 minutes, cut into bars. Shelf life: up to 10 days in a container.

Overnight Oats – The Breakfast That Makes Itself
Ingredients (per serving): 50 g oats, 100 ml milk or plant-based drink, 1 tsp chia seeds, fruit of choice, a bit of honey
Preparation: Layer all ingredients in a jar in the evening, let sit in the fridge overnight. In the morning, just spoon it up – without cooking!
Simple Recipes Your Older Child Can Make Themselves
Independence is not just practical – it also boosts your child's self-esteem. These recipes are so simple that children from around 4-5 years can make them with minimal supervision.
Shake Pizza (in a Jar)
Ingredients: 1 jar with a lid, 100 ml milk, 100 g flour, 1 egg, salt, grated cheese, tomato sauce, toppings of choice
Instructions for Your Child:
- Add milk, flour, egg, and a pinch of salt to the jar
- Put the lid on, shake vigorously (this is fun!)
- Pour into a greased baking dish
- Add tomato sauce, cheese, and toppings
- An adult puts it in the oven (180°C for about 20 minutes)
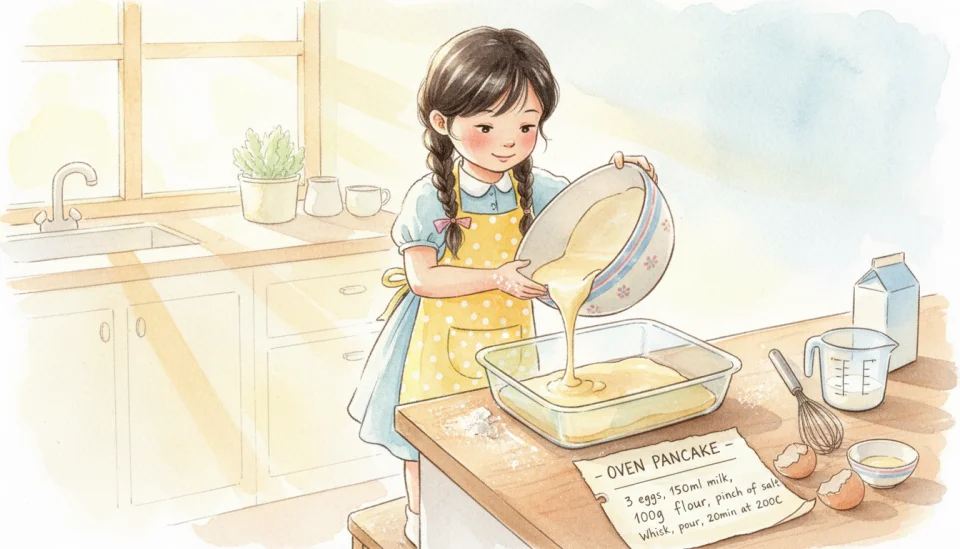
Oven Pancakes
Ingredients: 3 eggs, 150 ml milk, 100 g flour, pinch of salt, a bit of butter for the dish
Instructions: Put all ingredients in a bowl, whisk together, pour into a greased baking dish. An adult bakes at 200°C for about 20 minutes – and a fluffy pancake for everyone is ready!
Banana Bread Bites (No Baking Needed)
Ingredients: 2 ripe bananas, 100 g oats, 50 g raisins, 1 tsp cinnamon
Instructions: Mash bananas with a fork, mix with oats, raisins, and cinnamon, form small balls – done! (Optional: Bake for 10 minutes at 180°C for a firmer consistency.)
Involve Siblings in Meal Planning – Here's How
Children love to have a say. When you involve your older child in planning, they feel seen and important – and you benefit from less resistance during meals.
Practical Tips for Involvement
- Choose Snacks Together: Let your child pick 3-5 favorite snacks from a preset list
- Visualize Weekly Plans: Hang a colorful board in the kitchen showing which snacks are available on which days
- Assign a "Snack Chief" Role: Your child can decide once a day what goes into the nursing basket
- Shop Together (or order online): Show pictures of snacks and let your child click along or choose in-store
- Delegate Small Tasks: "Can you put the apple slices in the box?" – these mini-tasks give structure and pride

Emergency Checklist: Your Postpartum Snack Plan at a Glance
So you don’t lose track in the hustle and bustle of postpartum life, here is a compact checklist to tick off:
- Before Birth: Prepare and store energy balls, granola bars, and dried fruits
- Set Up the Nursing Basket: Portion snacks and place them at child height
- Print Simple Recipes: Shake pizza, oven pancakes, overnight oats – with pictures for your child
- Create a Weekly Plan: What snacks are available on which day?
- Involve Older Sibling: Choose snacks together, delegate small tasks
- Keep Emergency Snacks Ready: Always have rice cakes, fruits, and cheese cubes in the fridge
- Prepare Drink Bottles: Place water or diluted juices at child height
Your Postpartum, Your Rules – with Snacks That Keep Everyone Happy
The postpartum period with an older sibling is a challenge, no question about it. But with a well-thought-out snack emergency plan, chaos turns into structure, stress into independence – and small moments become great successes for your firstborn. You don’t have to be perfect; you don’t have to do everything yourself. You can ask for help, prepare, delegate – and trust that your child can do what you expect of them.
So: Fill the nursing basket, print the recipes, let your older child help – and enjoy the precious first weeks with your newborn, while your elder proudly proclaims: "Mom, I made something by myself!"
Article translated from German → View original article
Sources & Research
Research Summary
Für Mütter mit Geschwisterkindern im Wochenbett ist es hilfreich, gesunde Snacks vorzubereiten und griffbereit zu halten. Praktische Tipps helfen dabei, Geschwister in die Essensorganisation einzubinden und ihnen einfache, selbstständige Zubereitung zu ermöglichen.
Sources Used
- Rezepte fürs Wochenbett - 14 Gerichte, die sich einfach vorbereiten lassen (Accessed on 2025-11-07)
- Ernährung im Wochenbett mit Stillkugel-Rezept (Accessed on 2025-11-07)
- 10 schnelle Rezeptideen fürs Wochenbett (Accessed on 2025-11-07)
- Rezepte fürs Wochenbett - 14 Gerichte, die sich einfach ... (Accessed on 2025-11-07)
- Die ersten vierzig Tage - Kochen mit Heng Ou (Accessed on 2025-11-07)
- Einfache Rezepte fürs Wochenbett (Accessed on 2025-11-07)
- Ernährung im Wochenbett mit Stillkugel-Rezept | rund∞fit (Accessed on 2025-11-07)
- 10 schnelle Rezeptideen fürs Wochenbett (Accessed on 2025-11-07)
- 30 Wochenbett Rezepte: Leckeres Vorkochen in der ... (Accessed on 2025-11-07)
- 19 schnelle Snacks für die Stillzeit (Accessed on 2025-11-07)
- Kochrezepte fürs Wochenbett - unsere schnellen Ideen für ... (Accessed on 2025-11-07)
Medical Disclaimer
The information provided in this article is for educational purposes only and is not intended as a substitute for professional medical advice, diagnosis, or treatment. Always seek the advice of your physician or other qualified health provider with any questions you may have regarding a medical condition. Never disregard professional medical advice or delay in seeking it because of something you have read on this website.
Similar Posts
Sibling Communication: How to Lovingly Prepare Your Child for the New Baby
Preparing your child for the arrival of a new baby is one of the most important tasks during pregnancy. With the right w...
Asking for Help in the Postpartum Period: 7 Concrete Ways Friends Can Support You Now
The baby is here, and so is the exhaustion – but asking for help is so hard. Learn how to specifically articulate what y...
Celebrating Sibling Love: 7 Cultural Rituals to Enrich Your Family Life After Birth
The first weeks with a baby are magical—and challenging for sibling children. Discover heartwarming rituals from differe...
The Spa Day for Siblings: 7 Creative Ways to Enjoy the Postpartum Period Together
The postpartum period with multiple children? Turn the challenge into an opportunity: A spa day at home gives siblings a...